Camco Rhino Tote Tank Manual: A Comprehensive Guide
Today, March 5th, 2026, at 11:42:34 AM, users discuss WhatsApp issues – syncing problems, account logouts, and security concerns, alongside phone recommendations.
Recent online conversations from October 19th, 2025, through May 27th, 2026, highlight user experiences with WhatsApp, ranging from data management to potential account compromises.
These discussions, including a reported WhatsApp hack on September 8th, 2025, underscore the need for a detailed guide to related equipment, like the Camco Rhino Tote Tank.
Understanding Camco Rhino Tote Tanks
Recent online discussions, spanning from November 12th, 2025, to May 25th, 2026, reveal a common thread: users are increasingly reliant on mobile communication and data management. This reliance extends to practical needs like water management, where tools like the Camco Rhino Tote Tank become essential.
These tanks aren’t merely containers; they represent a solution for situations where convenient water access is limited. The conversations about WhatsApp account security and data preservation parallel the need for reliable, self-contained systems.
Understanding the purpose of a Rhino Tote Tank requires recognizing its role in providing portable water storage. Users, like those discussing phone choices for WhatsApp, prioritize functionality and dependability. The tank’s design addresses the need for a robust and manageable water source, mirroring the desire for a secure and accessible communication platform.
Essentially, the Rhino Tote Tank offers a practical solution, much like a dependable phone for staying connected.
What is a Camco Rhino Tote Tank?
Reflecting the online chatter from October 17th, 2025, regarding changing WhatsApp numbers discreetly, the Camco Rhino Tote Tank offers a self-contained solution – in this case, for water. It’s a portable water container designed for various applications where a fixed water source isn’t readily available.
Unlike the concerns about iMessage’s user-friendliness in Malaysia (November 23rd, 2025), the Rhino Tote Tank prioritizes straightforward functionality. It’s built to transport and store water, offering independence from municipal systems or established plumbing.
These tanks, often ranging in size, are constructed from durable materials to withstand the rigors of transport and outdoor use. They are frequently used for recreational vehicles, camping, and emergency preparedness, providing a reliable water supply.
Essentially, it’s a robust, mobile water reservoir, offering a practical solution, much like a rugged 4G phone for WhatsApp, as suggested on May 25th, 2025.
Common Uses for Rhino Tote Tanks
Echoing the discussions around WhatsApp account issues and potential hacks (April 23rd, 2025, and September 8th, 2025), a Rhino Tote Tank provides a secure, independent resource – in this instance, water; These tanks are incredibly versatile, serving numerous purposes beyond simple water storage.
RV and Camping: They’re frequently employed by recreational vehicle owners and campers to supply fresh water for drinking, cooking, and sanitation, offering freedom from campground hookups.
Emergency Preparedness: Like having a reliable phone for communication (May 25th, 2025), a Rhino Tote Tank is crucial for emergency water reserves during natural disasters or water supply disruptions.
Construction & Agriculture: They provide water for remote job sites, livestock, or irrigation where access to a water source is limited.
Outdoor Events: From festivals to family gatherings, these tanks ensure a convenient water supply for attendees. They offer a practical solution, similar to the need for a simple 4G phone.
Rhino Tote Tank Models & Specifications
Reflecting online concerns about device compatibility (November 12th, 2025), Camco offers various Rhino Tote Tank models, differing in size and features for diverse user needs.
Popular Rhino Tote Tank Sizes (30, 40, 50 Gallon)
Considering the discussions around data size and management (WhatsApp chats exceeding 20GB, as of November 12th, 2025), selecting the appropriate Rhino Tote Tank capacity is crucial. The 30-gallon model is ideal for smaller applications, offering portability and ease of handling, suitable for short-term water storage needs.
The 40-gallon size strikes a balance between capacity and manageability, proving popular for recreational vehicles and situations requiring moderate water reserves. Finally, the 50-gallon Rhino Tote Tank provides the largest capacity, catering to extended off-grid living, larger groups, or scenarios demanding substantial water availability.
Each size maintains Camco’s commitment to durability, featuring robust construction designed to withstand regular use and transportation, mirroring the need for reliable communication tools discussed online.
Material Composition and Durability
Reflecting the concerns about device reliability highlighted in recent online discussions (WhatsApp account issues, device linking problems reported as late as May 27th, 2026), the Camco Rhino Tote Tank prioritizes robust material composition. Constructed from high-density polyethylene, these tanks are engineered for exceptional durability and resistance to punctures, impacts, and UV damage.
This material choice ensures long-term performance, even under harsh environmental conditions. The polyethylene is also non-toxic and BPA-free, guaranteeing safe water storage. The tank’s construction withstands the rigors of transportation and frequent use, similar to the demands placed on everyday communication devices.
Camco’s commitment to quality materials translates to a product built to last, offering peace of mind and reliable water storage for years to come;
Rhino Tote Tank Fittings and Connections
Mirroring the connectivity issues discussed online – syncing problems between WhatsApp on phones and PCs (reported as recently as April 22nd, 2025) – secure and reliable connections are crucial for the Camco Rhino Tote Tank. These tanks feature robust, threaded fittings designed for easy attachment of hoses and other accessories.
Standard connections typically include a garden hose thread inlet and outlet, allowing compatibility with readily available plumbing components. Adapters are often necessary for specific applications, ensuring a watertight seal. The fittings are constructed from durable materials to prevent leaks and withstand repeated use.
Properly tightened connections are essential for safe and efficient operation, preventing water loss and maintaining system integrity. Careful attention to fitting compatibility and secure attachment is paramount.
Setting Up Your Camco Rhino Tote Tank
Reflecting online concerns about account access and unexpected logouts (reported November 12th, 2025), careful preparation and secure setup are vital for optimal tank performance.
Initial Inspection and Preparation
Mirroring the user anxieties regarding unexpected account issues and potential hacks (as discussed online from October 2025 to May 2026), a thorough initial inspection is paramount before deploying your Camco Rhino Tote Tank. Carefully unpack the tank and meticulously examine it for any shipping damage – dents, cracks, or compromised fittings.
Verify all connections are present and undamaged. Ensure the drain valve operates smoothly and seals correctly. Before first use, rinse the tank thoroughly with clean water to remove any residual manufacturing debris. This preventative measure, akin to securing a WhatsApp account, safeguards against contamination.
Inspect the tank’s exterior for any imperfections. Familiarize yourself with all components, including any included accessories. Proper preparation, like maintaining a secure digital presence, ensures reliable and trouble-free operation.
Proper Placement and Leveling
Reflecting the online discussions about device linking issues and unexpected logouts (observed between October 2025 and May 2026), stable and correct placement is crucial for optimal Rhino Tote Tank performance. Select a firm, level surface capable of supporting the tank’s fully loaded weight. Uneven ground can cause stress on fittings and potentially lead to leaks, mirroring the frustration of syncing problems.
Avoid direct sunlight exposure to minimize algae growth. Ensure the location allows easy access for filling and draining. Utilize shims if necessary to achieve a perfectly level position – a slight incline can affect pump operation and accurate water level readings.
Consider proximity to your water source and drainage point for convenient connections. Secure the tank to prevent tipping, especially in windy conditions. A stable foundation, like a secure WhatsApp account, is essential for reliable functionality.
Connecting to Water Source & Drainage
Echoing the online concerns regarding WhatsApp account access and unexpected logouts (documented from November 2025 to April 2026), secure and reliable connections are paramount. Use a potable-water safe hose to connect the tank to your water source, ensuring a tight fit with appropriate fittings. Verify compatibility to prevent leaks, similar to ensuring a stable WhatsApp connection;
For drainage, employ a compatible hose and secure connection to your designated disposal area. Avoid sharp bends in hoses, which can restrict flow. Consider using a filter on the intake hose to prevent debris from entering the tank.
Regularly inspect all connections for tightness and wear. Proper connections, like a safeguarded WhatsApp account, prevent unwanted disruptions and maintain system integrity.
Operating Instructions & Best Practices
Reflecting online discussions about WhatsApp syncing issues (May 2025), consistent monitoring and careful operation are crucial for optimal tank performance and longevity.
Filling the Rhino Tote Tank
Considering recent online concerns about account access and unexpected logouts (April & May 2025), a methodical approach to filling your Rhino Tote Tank is essential. Begin by ensuring the tank is positioned on a level surface, as discussed in setup instructions. Connect a potable water source using an approved hose, verifying a secure connection to prevent leaks – mirroring the importance of secure WhatsApp accounts.
Slowly introduce water into the tank, avoiding forceful pressure that could damage fittings. Regularly monitor the water level using the tank’s sight gauge or a dipstick. Do not overfill; leave adequate space for expansion. As with managing large WhatsApp data (over 20GB reported in 2025), careful capacity management is key. Periodically check connections during filling for any signs of leakage, addressing them immediately. Remember, consistent monitoring, like tracking WhatsApp messages, ensures optimal performance and prevents potential issues.
Monitoring Water Levels
Reflecting the need for consistent account checks, as highlighted by users experiencing WhatsApp logouts in 2025, regularly monitoring your Rhino Tote Tank’s water level is crucial. Utilize the tank’s integrated sight gauge for a quick visual assessment. Alternatively, employ a clean dipstick to accurately measure the water depth, ensuring precise readings.
Frequent checks are particularly important during periods of high water usage, preventing the tank from running dry – similar to avoiding WhatsApp message syncing issues. Be mindful of potential fluctuations due to temperature changes. As discussions around WhatsApp data size (exceeding 20GB) demonstrate the importance of capacity awareness, understand your tank’s volume and usage patterns. Consistent monitoring, like tracking WhatsApp activity, allows for proactive management and avoids unexpected disruptions.
Safe Water Usage Guidelines
Echoing the security concerns raised in online discussions about WhatsApp accounts being hacked in 2025, prioritize water safety when utilizing your Rhino Tote Tank. Only use the tank for potable water, ensuring it meets local health standards. Avoid introducing contaminants – similar to protecting your WhatsApp from unauthorized access.
Regularly sanitize the tank, following recommended cleaning procedures, to prevent bacterial growth. Be cautious of water temperature, especially in warmer climates, as this can accelerate contamination. As users discuss phone durability (Oppo A3x recommendation, October 2025), consider the tank’s material and protect it from extreme weather. Responsible water usage, like mindful WhatsApp data management, ensures a safe and reliable experience. Always adhere to local regulations regarding water disposal.
Maintenance and Cleaning
Reflecting online discussions about account upkeep (WhatsApp data deletion, November 2025), regular tank cleaning is vital. Sanitize frequently, mirroring digital security practices.
Regular Cleaning Procedures
Mirroring the need for digital account maintenance, as discussed online (WhatsApp history management, October 2025), consistent cleaning of your Camco Rhino Tote Tank is crucial for preventing bacterial growth and maintaining water quality. After each use, thoroughly rinse the tank with clean water to remove any sediment or residue.
For a deeper clean, periodically use a non-abrasive cleaner specifically designed for potable water tanks. Avoid harsh chemicals or bleach, as these can contaminate the water and damage the tank’s material. A solution of mild soap and water works effectively. Scrub the interior surfaces with a long-handled brush, paying attention to corners and the bottom of the tank.
Rinse thoroughly until all traces of the cleaning solution are gone. Finally, sanitize the tank with a food-grade sanitizer, following the manufacturer’s instructions. Proper cleaning ensures safe and reliable water storage, much like securing your digital information.
Winterizing Your Rhino Tote Tank
Similar to safeguarding digital accounts from potential breaches (as highlighted in discussions about WhatsApp security, September 2025), protecting your Camco Rhino Tote Tank from freezing temperatures is essential. Before the first freeze, completely drain all water from the tank, including from the fittings and connections.
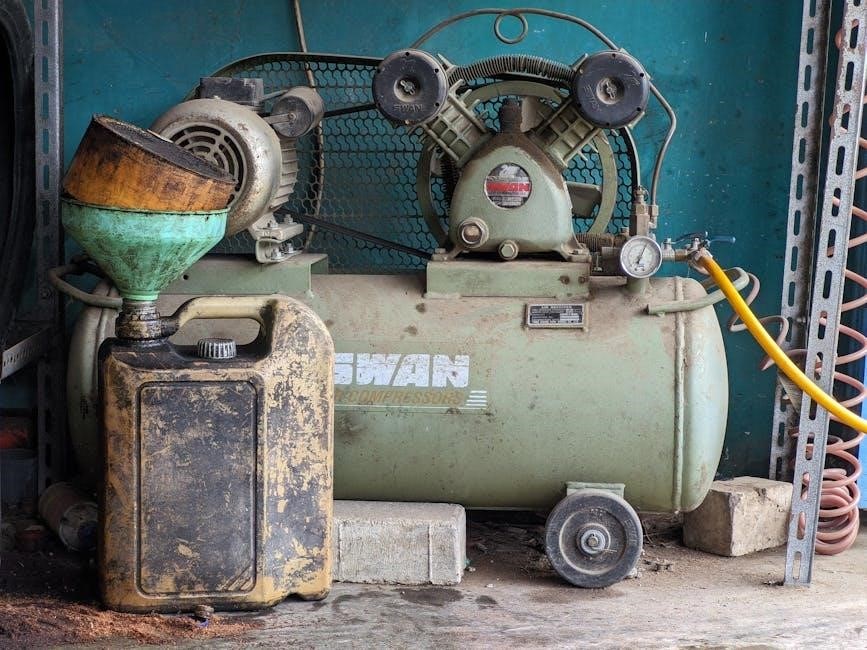
Open all valves and faucets to ensure thorough drainage. Consider using compressed air to blow out any remaining water in the lines. Do not use antifreeze not specifically designed for potable water systems, as it can contaminate your water supply.
Disconnect the tank from any water source and store it in a sheltered location, ideally indoors. Proper winterization prevents damage from ice expansion, ensuring the tank is ready for use when warmer weather returns, much like maintaining a secure digital presence.
Troubleshooting Common Issues
Reflecting the troubleshooting often needed with digital platforms like WhatsApp (as seen in user reports from November 2025 regarding syncing and account access), addressing issues with your Rhino Tote Tank is often straightforward. If you encounter problems, begin with a visual inspection for any obvious damage to the tank, fittings, or connections.
Check for loose connections or cracks. For pump-related issues, ensure the pump is properly primed and the power source is functioning. If odors develop, a thorough cleaning is likely required (see the ‘Maintenance and Cleaning’ section).
Remember, consistent monitoring and preventative maintenance, similar to securing your digital accounts, can minimize the occurrence of these common problems and extend the life of your tank.
Troubleshooting Common Problems
Mirroring digital troubleshooting (WhatsApp syncing issues reported November 2025), address leaks, pump failures, and unpleasant odors promptly for optimal tank performance and longevity.
Leak Detection and Repair
Similar to diagnosing issues with digital accounts (as discussed online in November 2025 regarding WhatsApp), proactive leak detection is crucial for your Camco Rhino Tote Tank. Begin by visually inspecting all fittings, connections, and the tank body itself, both when empty and filled. Look for drips, moisture, or discoloration, which indicate potential leak points.
For minor leaks at fittings, try tightening the connection – but avoid over-tightening, which can damage threads. If tightening doesn’t resolve the issue, consider replacing the Teflon tape or O-ring seal. For cracks in the tank body, unfortunately, repair is often not feasible; replacement is generally recommended.
Always depressurize the tank completely before attempting any repairs. If you’re uncomfortable performing repairs yourself, consult a qualified RV technician. Remember, consistent monitoring, like checking WhatsApp regularly, prevents larger, more costly problems.
Pump Issues and Solutions
Echoing the troubleshooting often needed with digital platforms like WhatsApp (as seen in discussions from April 22nd, 2025), pump malfunctions with your Camco Rhino Tote Tank require systematic diagnosis. A common issue is the pump failing to prime – ensure the pump is fully submerged in the tank’s liquid and that all intake hoses are free of kinks or obstructions.
If the pump runs but delivers low flow, check for clogs in the pump impeller or discharge hose. Disconnect the hose and inspect for blockages. For pumps that don’t run at all, verify the power source and check the pump’s internal fuse or circuit breaker.
Regularly cleaning the pump’s filter, similar to maintaining a clean WhatsApp account, will prevent many issues. If problems persist, consult the pump’s specific manual or seek assistance from a qualified technician.
Addressing Odor Concerns
Similar to addressing unwanted messages or account compromises discussed in online forums (November 12th, 2025, and onward), unpleasant odors emanating from your Camco Rhino Tote Tank require prompt attention. Stagnant water is the primary culprit; regular flushing with fresh water and a dedicated tank cleaner is crucial.
Consider using a non-toxic, RV-specific tank treatment after each emptying to neutralize odors and break down waste. Ensure the vent pipe isn’t blocked, as this prevents proper air circulation and can exacerbate smells. Inspect all seals and connections for leaks, as even small leaks can contribute to odor buildup.
Thorough cleaning, much like maintaining a secure WhatsApp account, is preventative. If odors persist despite these measures, a more intensive cleaning with a bleach solution (diluted appropriately) may be necessary.
Safety Precautions
Reflecting concerns about account security (September 8th, 2025), prioritize safe water handling, electrical considerations, and proper storage to prevent accidents and maintain tank integrity.
Safe Handling of Water
Considering recent discussions about potential compromises (like the WhatsApp hack reported on September 8th, 2025), maintaining water safety with your Camco Rhino Tote Tank is paramount. Always use potable water hoses specifically designed for drinking water; standard garden hoses can leach harmful chemicals.
Avoid overfilling the tank, as this can create instability and potential spillage during transport. When dispensing water, ensure the area is clear of obstructions and potential tripping hazards. Never leave a filled tank unattended, especially on uneven surfaces.
Regularly sanitize the tank and all connected components to prevent bacterial growth, particularly if using non-potable water sources for non-drinking purposes. Be mindful of water weight – a full tank can be extremely heavy, requiring appropriate lifting techniques or assistance to prevent injury. Always follow local regulations regarding wastewater disposal.
Electrical Safety Considerations
Reflecting concerns about account security, as seen in discussions regarding WhatsApp issues (reported logouts on April 23rd, 2025), electrical safety with your Camco Rhino Tote Tank’s pump is crucial. Always ensure the pump is properly grounded to prevent electrical shock. Use a Ground Fault Circuit Interrupter (GFCI) outlet when operating the pump, especially in damp environments.
Inspect the pump’s power cord regularly for damage – cracks, fraying, or exposed wires. Never operate a pump with a damaged cord. Avoid using extension cords whenever possible; if necessary, use a heavy-duty, outdoor-rated extension cord.
Do not submerge the pump or any electrical components in water. Disconnect the pump from the power source before performing any maintenance or cleaning. If you notice any unusual smells or sounds coming from the pump, immediately disconnect it and consult a qualified electrician.
Proper Storage Guidelines
Mirroring the need for data preservation, as discussed in the context of WhatsApp chat history (over 20GB, as of November 12th, 2025), proper storage of your Camco Rhino Tote Tank is vital for longevity. When not in use, thoroughly clean and completely drain the tank to prevent bacterial growth and odors.
Store the tank in a cool, dry, and shaded area, away from direct sunlight and extreme temperatures. Avoid storing the tank where it could be exposed to freezing conditions, which can cause damage. If freezing is unavoidable, winterize the tank as detailed in the maintenance section.
Ensure the tank is stored on a level surface to prevent stress on the fittings and connections. Disconnect all hoses and fittings and store them separately. Consider using a tank cover to protect it from dust and debris.
Camco Rhino Tote Tank Accessories
Reflecting user needs for reliable communication tools (like 4G phones for WhatsApp, discussed October 17th, 2025), accessories enhance tank functionality.
Pumps, hoses, fittings, and protective covers are readily available to optimize your Camco Rhino Tote Tank experience.
Available Pumps and Hoses
Considering the recent discussions about reliable connections (like WhatsApp and 4G phones, noted October 17th, 2025), selecting the right pump and hose is crucial for efficient operation of your Camco Rhino Tote Tank. Several pump options cater to different needs, ranging from manual hand pumps for basic transfer to 12-volt electric pumps offering faster and more convenient operation.
Hose options vary in length and diameter, with reinforced hoses recommended for durability and resistance to kinks. Look for hoses specifically designed for potable water to ensure water safety. Adapters are often necessary to connect the pump and hose to the tank’s fittings.
When choosing, consider the distance you need to transfer water and the desired flow rate. Remember the importance of secure connections, mirroring the need for stable WhatsApp connections discussed online (November 12th, 2025), to prevent leaks and maintain optimal performance.
Fittings and Adapters
Reflecting the online concerns about compatibility and connection issues (like iMessage in Malaysia, discussed November 23rd, 2025), understanding the fittings and adapters for your Camco Rhino Tote Tank is essential. Tanks typically feature threaded openings for hose connections, often utilizing standard garden hose threads.
However, specific applications may require adapters to connect to different hose types or water source connections. These adapters can include NPT (National Pipe Thread) to garden hose adapters, or fittings for quick-connect hose systems.
Ensure all fittings are made of durable, non-corrosive materials suitable for potable water. Tighten connections securely to prevent leaks, similar to ensuring a stable WhatsApp connection (April 22nd, 2025). Regularly inspect fittings for wear and tear, replacing them as needed to maintain a reliable and safe water system.
Tank Covers and Protection
Considering the discussions around phone durability and ruggedness (May 25th, 2025, regarding 4G phones for WhatsApp), protecting your Camco Rhino Tote Tank from the elements and physical damage is crucial for longevity. Direct sunlight can degrade the tank material over time, while impacts can cause cracks or punctures.
Tank covers, often made from UV-resistant materials, shield the tank from harmful rays and help maintain water temperature. Additional protection can be provided by placing the tank in a sheltered location or using a protective enclosure.
Similar to safeguarding a WhatsApp account from hacking (September 8th, 2025), proactive protection prevents costly repairs or replacements. Regularly inspect the tank and cover for any signs of damage, addressing issues promptly to ensure continued reliable performance and water quality.